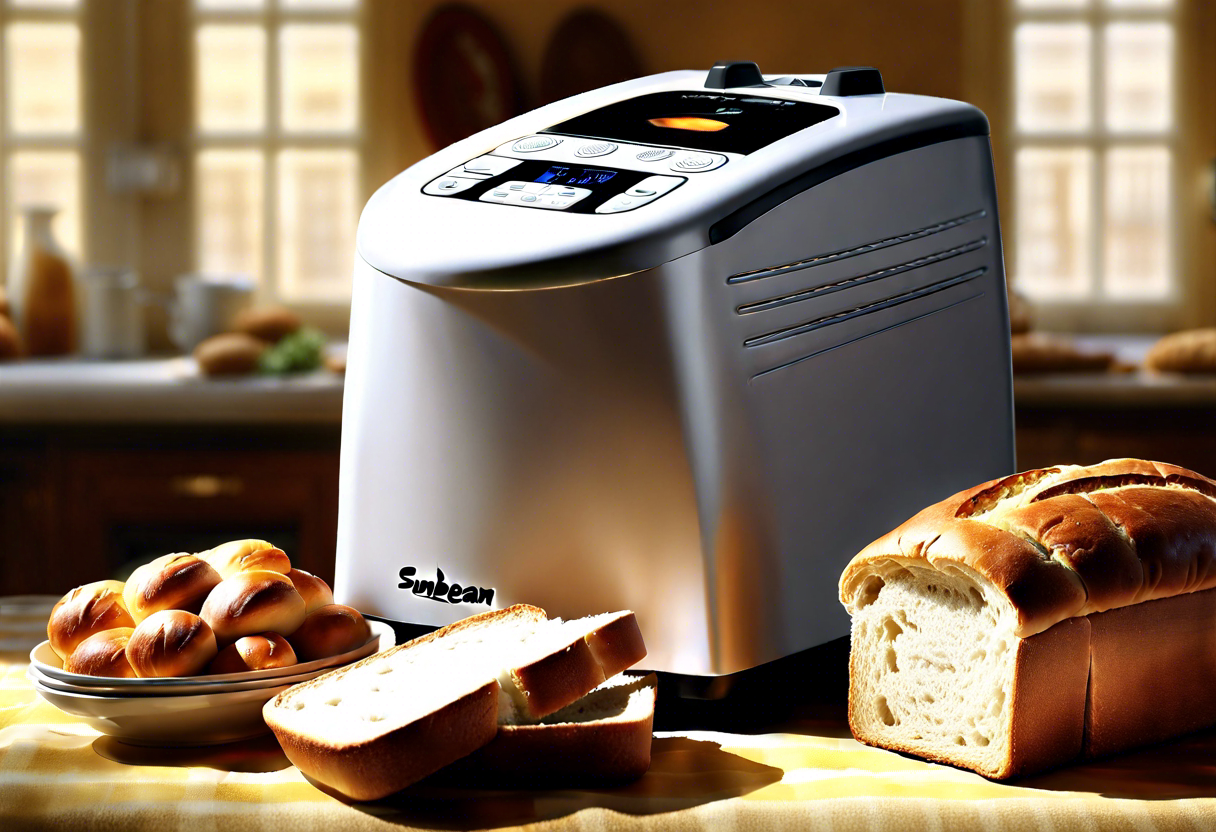
Benefits of Using a Sunbeam Bread Maker
Are you tired of store-bought bread that lacks freshness and flavor? Do you want to take control of your bread-making process? Look no further than the Sunbeam bread maker. This versatile appliance offers numerous benefits that will revolutionize your baking experience.
1. Convenience: Using a Sunbeam bread maker allows you to enjoy freshly baked bread without the hassle of kneading and monitoring. Simply add your ingredients, select the desired settings, and let the machine do the work. You can wake up to the aroma of freshly baked bread or have it ready for dinner.
2. Variety: With a Sunbeam bread maker, you can create a wide range of bread types, from classic white and whole wheat to specialty options like gluten-free or artisan bread. Customize your recipes by incorporating your favorite ingredients, such as nuts, dried fruits, or herbs.
3. Time-Saving: Traditional bread-making methods can be time-consuming, requiring multiple steps and hours of rising time. With a Sunbeam bread maker, you can have a loaf of bread ready in as little as one hour. This is particularly beneficial for busy individuals and families.
4. Cost-Effective: Making your own bread can be more cost-effective in the long run compared to buying store-bought options. The initial investment in a Sunbeam bread maker is quickly offset by the savings from baking your own bread.
5. Healthier Options: Commercial bread often contains additives and preservatives to extend shelf life. By making your own bread with a Sunbeam bread maker, you have full control over the ingredients, allowing you to create healthier alternatives without sacrificing taste.
6. Easy to Use: Sunbeam bread makers are designed with user-friendly controls and clear instructions. Even beginners can confidently make delicious bread with consistent results. The intuitive interface and preset programs take the guesswork out of bread making.
7. Compact Design: Sunbeam bread makers are compact and take up minimal counter space, making them ideal for small kitchens or those with limited storage. Their sleek design adds a touch of modernity to your culinary space.
8. Clean-up Made Easy: Sunbeam bread makers feature non-stick baking pans and removable components, allowing for easy cleaning. Simply wipe the machine with a damp cloth or remove the baking pan for a thorough wash.
The Sunbeam bread maker offers a host of benefits, including convenience, variety, time-saving aspects, cost-effectiveness, healthier options, ease of use, compact design, and easy clean-up. a Sunbeam bread maker into your kitchen will allow you to enjoy freshly baked bread with minimal effort. Say goodbye to store-bought bread and embrace the joy of homemade goodness.
Different Types of Bread You Can Make with the Sunbeam Bread Maker
When it comes to homemade bread, the Sunbeam bread maker is a versatile and convenient appliance that allows you to create various types of bread right in your own kitchen. With its user-friendly features and functions, you can experiment with different ingredients and flavors to bake bread that suits your taste preferences. In this article, we will explore some of the different types of bread you can make with the Sunbeam bread maker.
-
Basic White Bread: The Sunbeam bread maker is perfect for making classic white bread. The machine takes care of all the kneading, rising, and baking, so you can enjoy a freshly baked loaf of bread without the hassle. Simply add the ingredients to the bread pan, select the basic white bread program, and let the machine do the rest.
-
Whole Wheat Bread: If you prefer a healthier alternative, you can use the Sunbeam bread maker to bake delicious whole wheat bread. Whole wheat bread is rich in fiber and nutrients, making it a popular choice for those looking to incorporate more nutritious options into their diet. The bread maker’s program for whole wheat bread ensures that the dough is properly kneaded and goes through the necessary rising and baking cycles for a perfect loaf.
-
Multigrain Bread: With the Sunbeam bread maker, you can easily make multigrain bread by adding a variety of grains and seeds to the dough. This allows you to customize your bread with ingredients like flaxseed, sunflower seeds, oats, or even dried fruits and nuts. The bread maker will mix and incorporate all the ingredients evenly, resulting in a tasty and wholesome loaf.
-
Gluten-Free Bread: For individuals with gluten sensitivities or dietary restrictions, the Sunbeam bread maker offers a gluten-free bread program. This program is specifically designed to handle gluten-free flours and ingredients, ensuring that you can enjoy homemade gluten-free bread without compromising on taste or texture.
-
Sweet Bread: The Sunbeam bread maker is also ideal for creating sweet bread varieties, such as cinnamon raisin bread or banana bread. These breads typically include ingredients like sugar, cinnamon, fruits, or nuts, which give them a delightful aroma and flavor. The bread maker’s pre-set programs make it easy to prepare these sweet treats, allowing you to indulge in freshly baked bread for breakfast or as a tasty snack.
The Sunbeam bread maker provides a range of options for creating delicious homemade bread. Whether you prefer traditional white bread, healthier whole wheat or multigrain options, gluten-free alternatives, or sweet bread varieties, this appliance has got you covered. With its easy-to-use functions and versatile programs, the Sunbeam bread maker enables you to unleash your creativity in the kitchen and enjoy freshly baked bread whenever you desire. So why not give it a try and start experimenting with different types of bread today?
How to Use a Sunbeam Bread Maker for Beginners
So you’ve just brought home your brand new Sunbeam bread maker and you can’t wait to start baking your own fresh, homemade bread. But where do you begin? Don’t worry, we’ve got you covered. In this guide, we will walk you through the step-by-step process of using a Sunbeam bread maker, perfect for beginners who are new to bread making.
Step 1: Read the Instruction Manual
Before you start using your Sunbeam bread maker, it’s important to familiarize yourself with the instruction manual. This manual will provide you with valuable information about the different settings, functions, and recipes that you can try with your bread maker. Take some time to read through the manual and understand how your specific model works.
Step 2: Gather the Ingredients
Once you are familiar with your bread maker, it’s time to gather the ingredients for your bread. The basic ingredients you will need are flour, yeast, water, salt, and sugar. However, feel free to experiment with different types of flours, grains, and additional ingredients to create unique flavors and textures.
Step 3: Measure the Ingredients
Accurate measurements are crucial for successful bread making. Use a digital kitchen scale to weigh your ingredients, especially the flour. This will help ensure consistency in your bread texture and flavor. Follow the recipe provided in the instruction manual or try out your own variations using the recommended measurements.
Step 4: Add the Ingredients to the Bread Maker
Now that you have measured your ingredients, it’s time to add them to the bread maker. Start with the liquid ingredients such as water and oil, followed by the dry ingredients such as flour, yeast, salt, and sugar. It’s essential to add the ingredients in the order specified in the recipe to achieve the best results.
Step 5: Select the Settings
Once you have added the ingredients, it’s time to select the appropriate settings on your bread maker. Sunbeam bread makers come with a variety of settings for different types of bread, including basic, whole wheat, gluten-free, and even dough settings for preparing pizza or cinnamon rolls. Choose the setting that matches the type of bread you want to make or follow the recipe instructions provided in the manual.
Step 6: Start the Bread Maker
Once you have selected the settings, close the lid of the bread maker and press the start button. The bread maker will start kneading the dough, allowing it to rise and bake into a delicious loaf of bread. The entire process can take a few hours, depending on the type of bread and the size of the loaf you’re making.
Step 7: Remove and Cool the Bread
Once the bread maker has finished baking, carefully remove the pan from the bread maker using oven mitts or heat-resistant gloves. Allow the bread to cool in the pan for a few minutes, then transfer it to a wire rack to cool completely before slicing.
Using a Sunbeam bread maker for the first time may seem intimidating, but by following these simple steps, you’ll be on your way to producing delicious homemade bread in no time. Experiment with different recipes, flavors, and ingredients to discover your own signature loaf. Happy bread making!
Keeping Your Sunbeam Bread Maker Clean and Well-Maintained
Investing in a Sunbeam bread maker is a great decision for those who enjoy fresh, homemade bread. To ensure that your bread maker continues to perform at its best, it’s important to keep it clean and well-maintained. By following these cleaning and maintenance tips, you can prolong the lifespan of your Sunbeam bread maker and enjoy delicious bread for years to come.
Regular Cleaning
After each use, it’s essential to clean your Sunbeam bread maker thoroughly. Start by unplugging the machine and allowing it to cool down. Remove the bread pan, kneading blade, and any other removable parts. These can usually be washed in warm, soapy water. Be sure to dry them completely before reassembling.
Next, wipe down the inside of the bread maker with a clean, damp cloth. Be careful not to use any abrasive materials or harsh chemicals that may damage the surface. Pay extra attention to the heating element and the corners where dough residue may accumulate. A small brush or toothbrush can be useful for reaching these tight spots.
Deep Cleaning
While regular cleaning is usually sufficient, it’s a good idea to deep clean your Sunbeam bread maker periodically. Fill the bread pan with warm, soapy water and let it soak for a few minutes. Use a sponge or cloth to scrub away any stubborn stains or residue. Rinse the pan thoroughly and dry it before putting it back into the bread maker.
For the exterior of the machine, use a mild all-purpose cleaner and a soft cloth to wipe away any dirt or grease. Avoid spraying directly onto the bread maker, and instead, apply the cleaner to the cloth to prevent any liquid from seeping into the machine.
Maintenance Tips
In addition to regular cleaning, there are a few maintenance tips that can help keep your Sunbeam bread maker in optimal condition. First, ensure that you are using the correct measurements for ingredients, as excessive flour or liquid can cause damage to the machine.
Second, avoid overloading the bread pan with ingredients. Overfilling can prevent the dough from rising properly and may put unnecessary strain on the motor. Refer to your Sunbeam bread maker’s instruction manual for specific guidelines on ingredient quantities.
Storage
When not in use, store your Sunbeam bread maker in a cool, dry place to prevent any moisture buildup or damage. Make sure to unplug the machine and remove the bread pan, kneading blade, and any other detachable parts for proper cleaning and storage. Covering the machine with a cloth or placing it in a dust-free cabinet will help protect it from dust and dirt.
Proper cleaning and maintenance are essential for the longevity and performance of your Sunbeam bread maker. By following these tips, you can ensure that your machine continues to produce delicious and wholesome homemade bread for years to come.
Troubleshooting Common Issues with the Sunbeam Bread Maker
The Importance of Troubleshooting for Your Sunbeam Bread Maker
When it comes to baking your own bread at home, a Sunbeam bread maker is a convenient and efficient appliance to have. However, like any electronic device, you may encounter some common issues along the way. The good news is that most of these problems can be easily resolved with simple troubleshooting techniques. In this article, we will guide you through the process of troubleshooting common issues with your Sunbeam bread maker, ensuring that you can continue enjoying freshly baked bread with ease.
1. Unevenly Baked Bread
One of the most common issues faced by bread maker owners is unevenly baked bread. If you find that your bread is consistently undercooked, overcooked, or has a dense texture, there are a few potential causes to consider. First, ensure that you are using the correct measurements for ingredients, as inaccurate measurements can affect the texture and consistency of the bread. Additionally, check the kneading blade and make sure it is inserted correctly, as improper placement can result in uneven mixing and kneading.
2. Bread Not Rising Properly
If your bread fails to rise properly, it can be quite disappointing. However, don’t let this discourage you – there are several troubleshooting steps you can take to remedy the situation. Firstly, check the expiration dates of your yeast and flour, as expired ingredients can affect the rising process. Additionally, ensure that the yeast is fresh and activated before using it. You can do this by mixing it with warm water and sugar, allowing it to bubble and froth for a few minutes before adding it to the bread mixture.
3. Error Messages on Display
Modern Sunbeam bread makers are equipped with digital displays that may show error messages from time to time. These messages are designed to alert you to various problems that may arise during the bread-making process. If you encounter an error message, consult your Sunbeam bread maker’s manual for specific instructions on how to troubleshoot the issue. Common error messages may relate to power outages, overheating, or improper dough consistency.
4. Bread Sticking to the Pan
Having your freshly baked bread stick to the pan can be frustrating, especially after putting in the time and effort to make it. To prevent this issue, it is essential to properly prepare the bread pan before use. Make sure to thoroughly grease the inside of the pan with oil or cooking spray. Additionally, avoid using excessive amounts of flour, as this can cause sticking. If you are still experiencing problems with sticking, consider investing in a non-stick bread pan or lining the existing pan with parchment paper.
5. Unusual Noises or Vibrations
If you notice unusual noises or excessive vibrations coming from your Sunbeam bread maker during operation, it may indicate an underlying issue. In these cases, it is recommended to unplug the appliance immediately and seek professional assistance. Continuing to use a bread maker that exhibits these symptoms may pose a safety risk and could potentially damage the machine further.
By following these troubleshooting techniques, you can address common issues with your Sunbeam bread maker and ensure that your baking experience remains enjoyable and hassle-free. Remember to consult your user manual for specific instructions pertaining to your model, and always prioritize safety when working with electronic appliances. With a little patience and practice, you will soon be enjoying delicious homemade bread with your Sunbeam bread maker.
Conclusion
The Sunbeam bread maker offers numerous benefits for bread enthusiasts of all skill levels. Its ease of use, versatility, and ability to create a wide variety of bread types make it a popular choice for home bakers. Whether you are a beginner or an experienced baker, the Sunbeam bread maker provides a convenient and efficient way to enjoy freshly baked bread in the comfort of your own home.
Using a Sunbeam bread maker opens up a world of possibilities in terms of bread options. From classic white bread to hearty whole wheat and deliciously sweet cinnamon raisin, this versatile machine allows you to experiment with different flavors, textures, and ingredients. The included recipe book provides inspiration and guidance for creating breads that suit your taste and dietary preferences.
For beginners, the Sunbeam bread maker is an excellent choice due to its user-friendly features and straightforward operation. By following a few simple steps outlined in the user manual, you can quickly and easily produce a perfectly baked loaf of bread. The machine’s preprogrammed settings take the guesswork out of the baking process, ensuring consistent results every time.
To keep your Sunbeam bread maker in optimal condition and prolong its lifespan, regular cleaning and maintenance are essential. After each use, it is important to wipe down the exterior of the machine and remove any excess crumbs or dough. The bread pan and kneading paddle should be washed with warm soapy water, ensuring they are thoroughly dried before reassembly. Additionally, periodic descaling of the unit is recommended to prevent mineral build-up and maintain optimal performance.
Despite its reliability, occasional issues may arise when using your Sunbeam bread maker. Common problems include unevenly baked bread, dough not rising properly, or error messages appearing on the display. In such cases, troubleshooting tips provided in the user manual can help resolve these issues. Checking the ingredients’ measurements, ensuring the machine is placed on a stable surface, and selecting the appropriate bread size and crust color are some basic steps to address common problems.
The Sunbeam bread maker is a valuable addition to any kitchen. With its benefits of convenience, versatility, and ease of use, this machine allows you to enjoy freshly baked bread at home. From basic loaves to specialty breads, the possibilities are endless. By following the user manual’s instructions and implementing proper cleaning and maintenance practices, your Sunbeam bread maker will continue to deliver delightful loaves for years to come.